Welcome to the first of our case studies. In this study we look at tricky existing conditions and how they were resolved. Living with an outdated bathroom doesn’t necessarily affect function, but it can certainly have a detrimental effect on overall enjoyment and satisfaction. Yet, change isn’t always simple. Oftentimes, a bathroom presents a set of challenges that make coming up with a new design quite tricky, to say the least.
When my client, Pam, came to me wanting a change for her dated finishes, lighting, and fixtures in her existing master bathroom, I knew right away that creativity was essential to completing the project. Her goal was an updated space that was filled with light and both serene and elegant, but the space was the polar opposite, giving off a dark and cramped aesthetic. It was an uphill battle at first, but we managed to make her dream a reality.
So, without further ado, let’s dive into the project details...
Project Parameters:
Retain existing cabinetry and wall placement
Retain existing window treatments
Retain solid walls and partial height wall of the shower
Reuse existing channeled ottoman and vanity stool
Project Challenges:
Gothic-style arched clerestory windows above vanities
Vanities located directly across from each other with with completely different layouts
Octagonal shape of room paired with angled ceiling sections
The Challenges
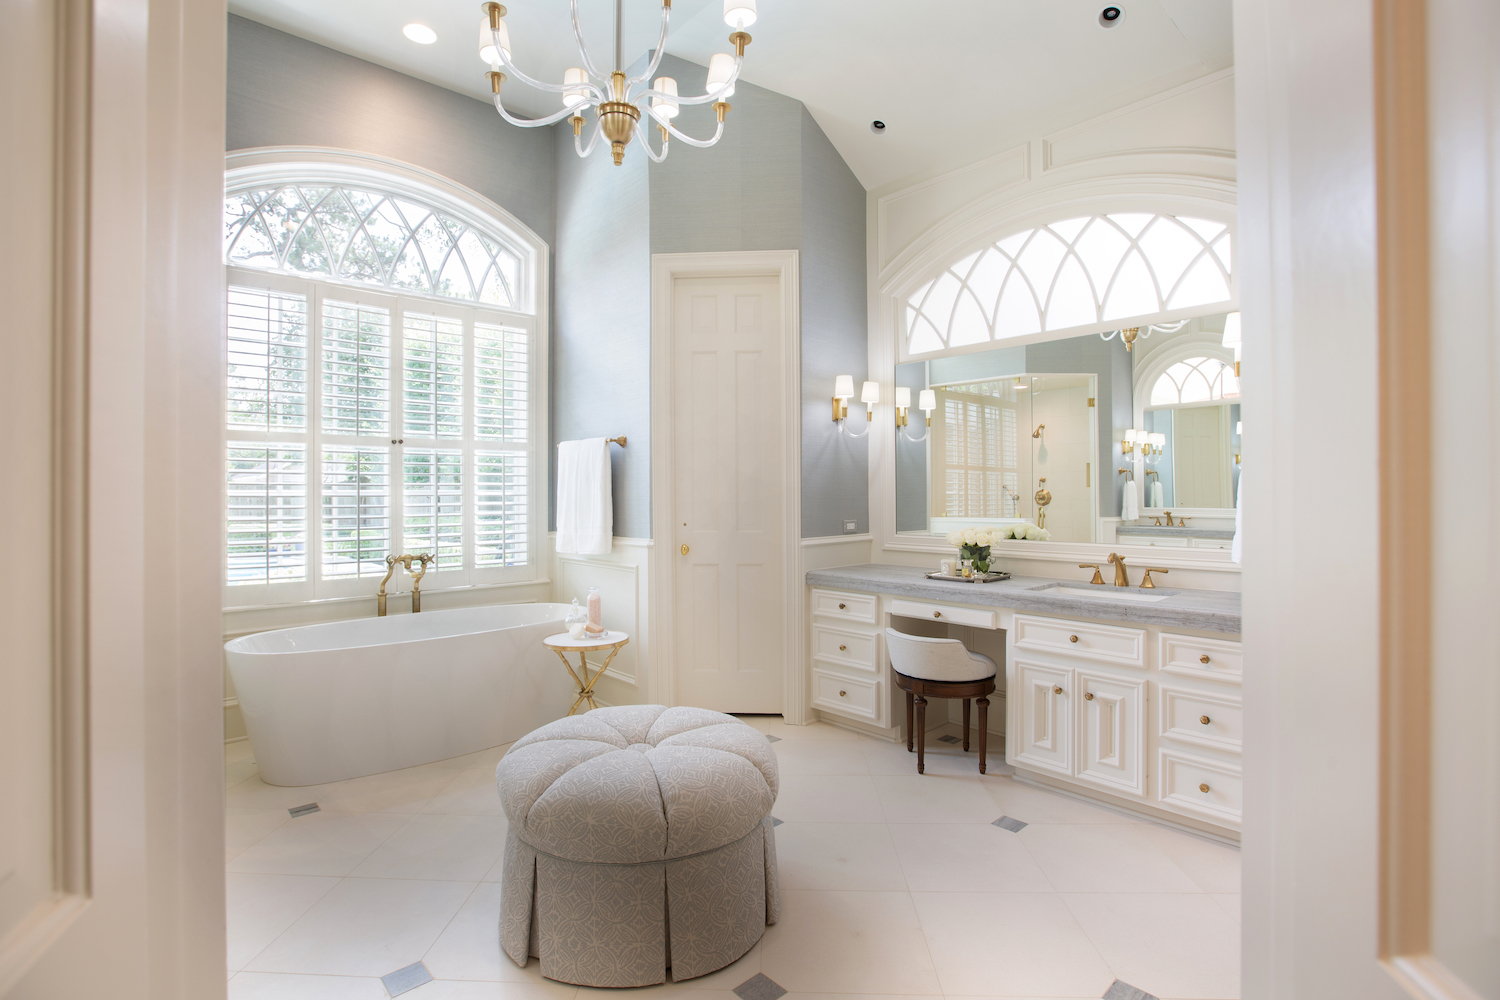
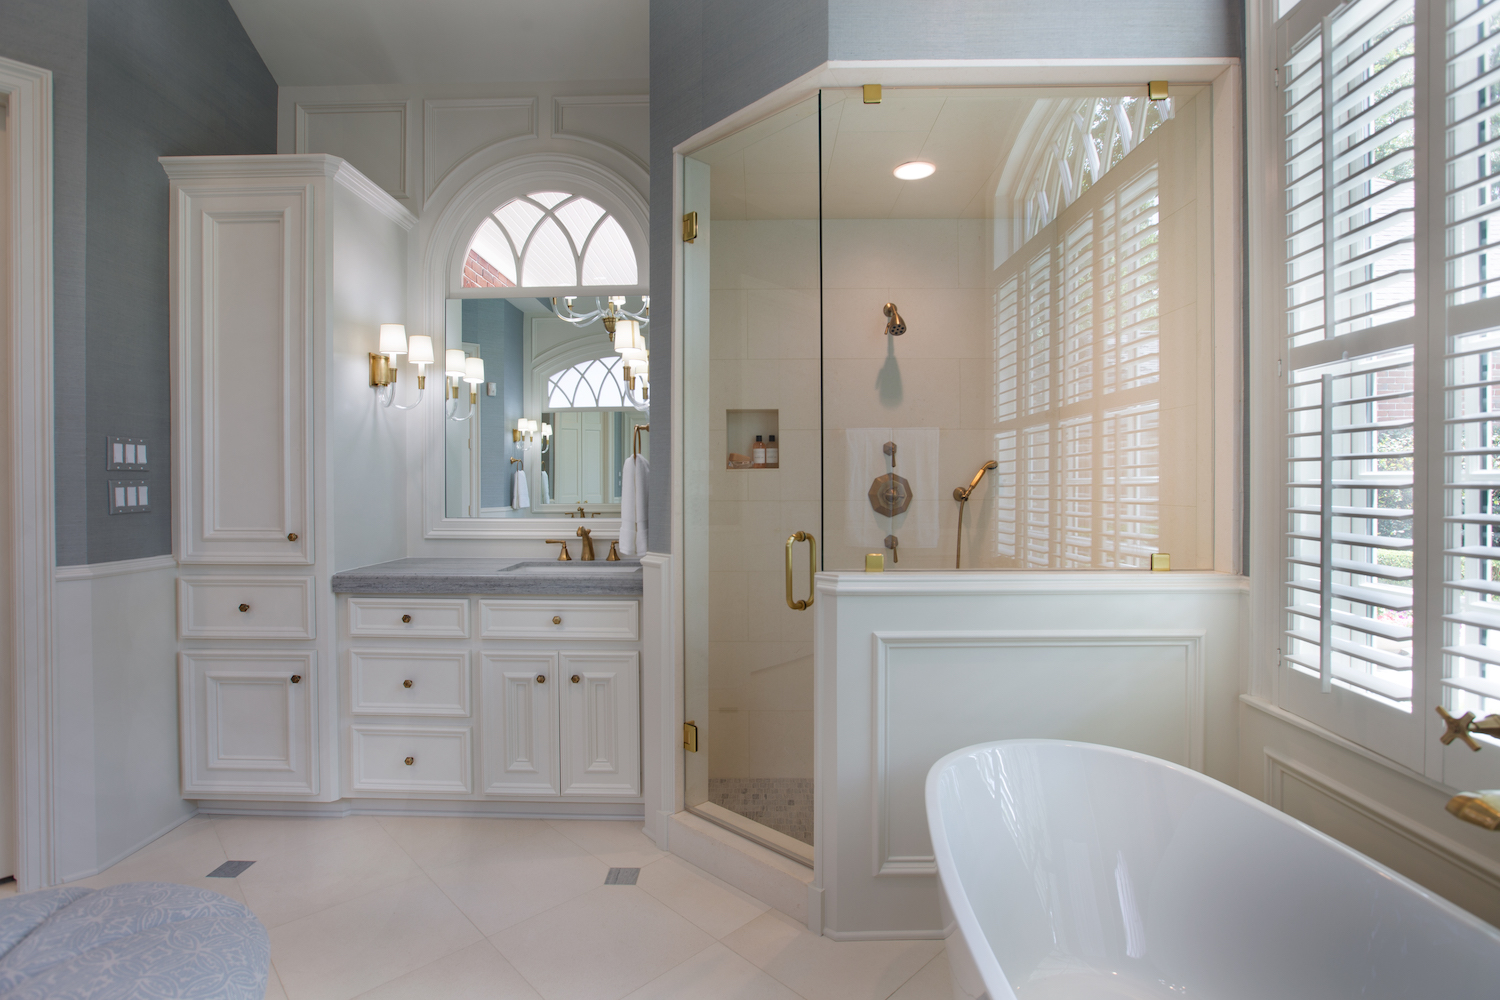
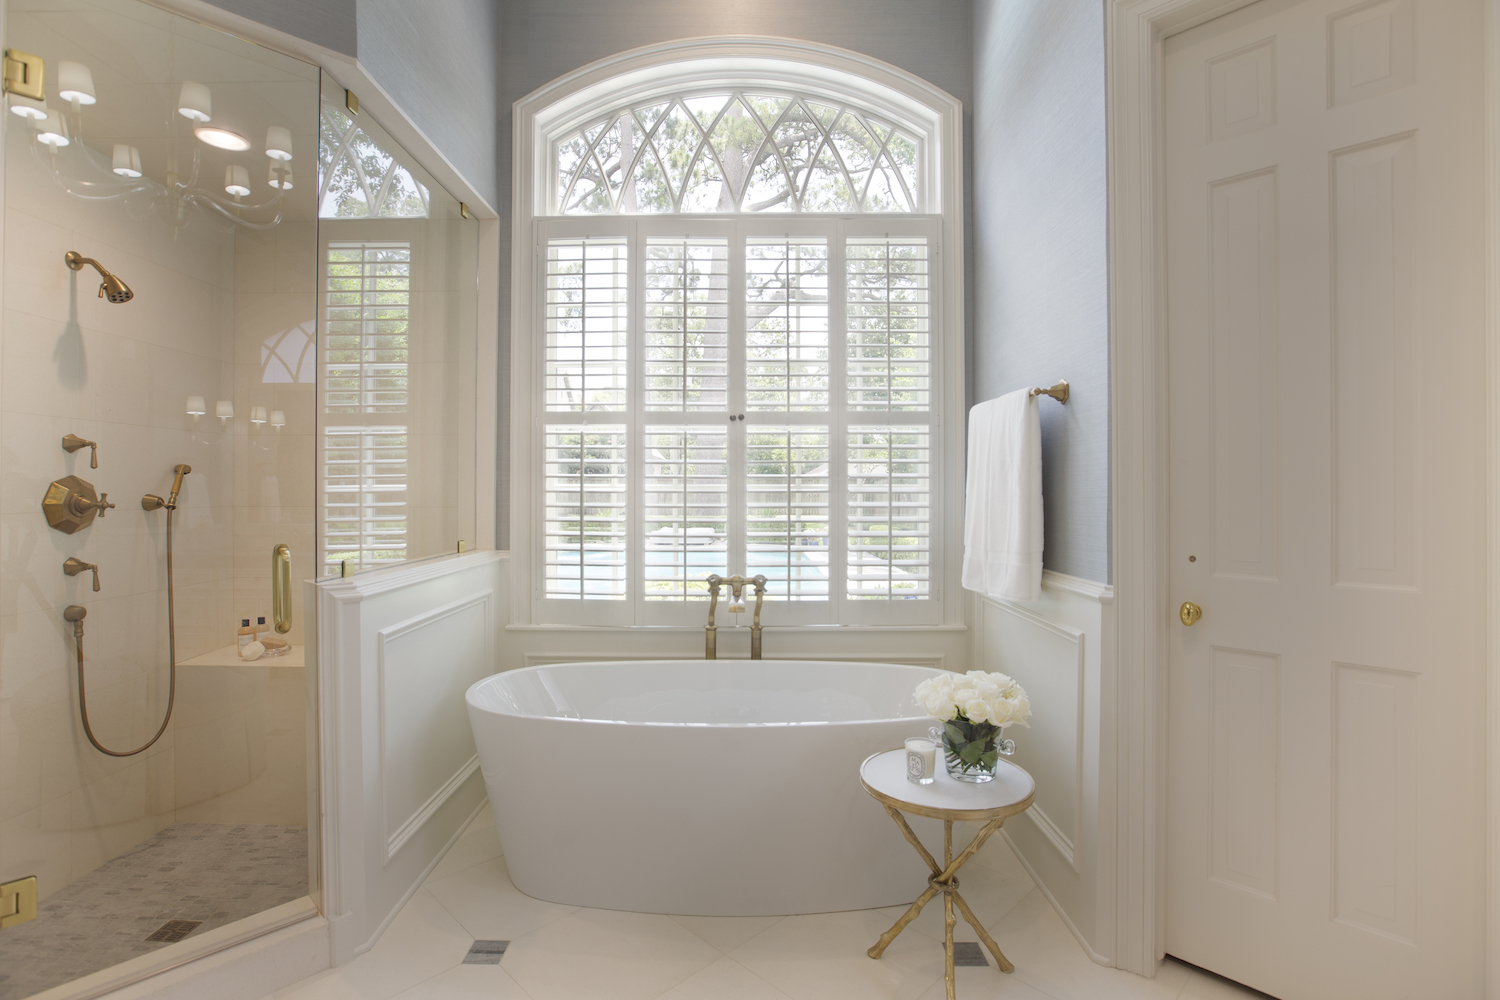
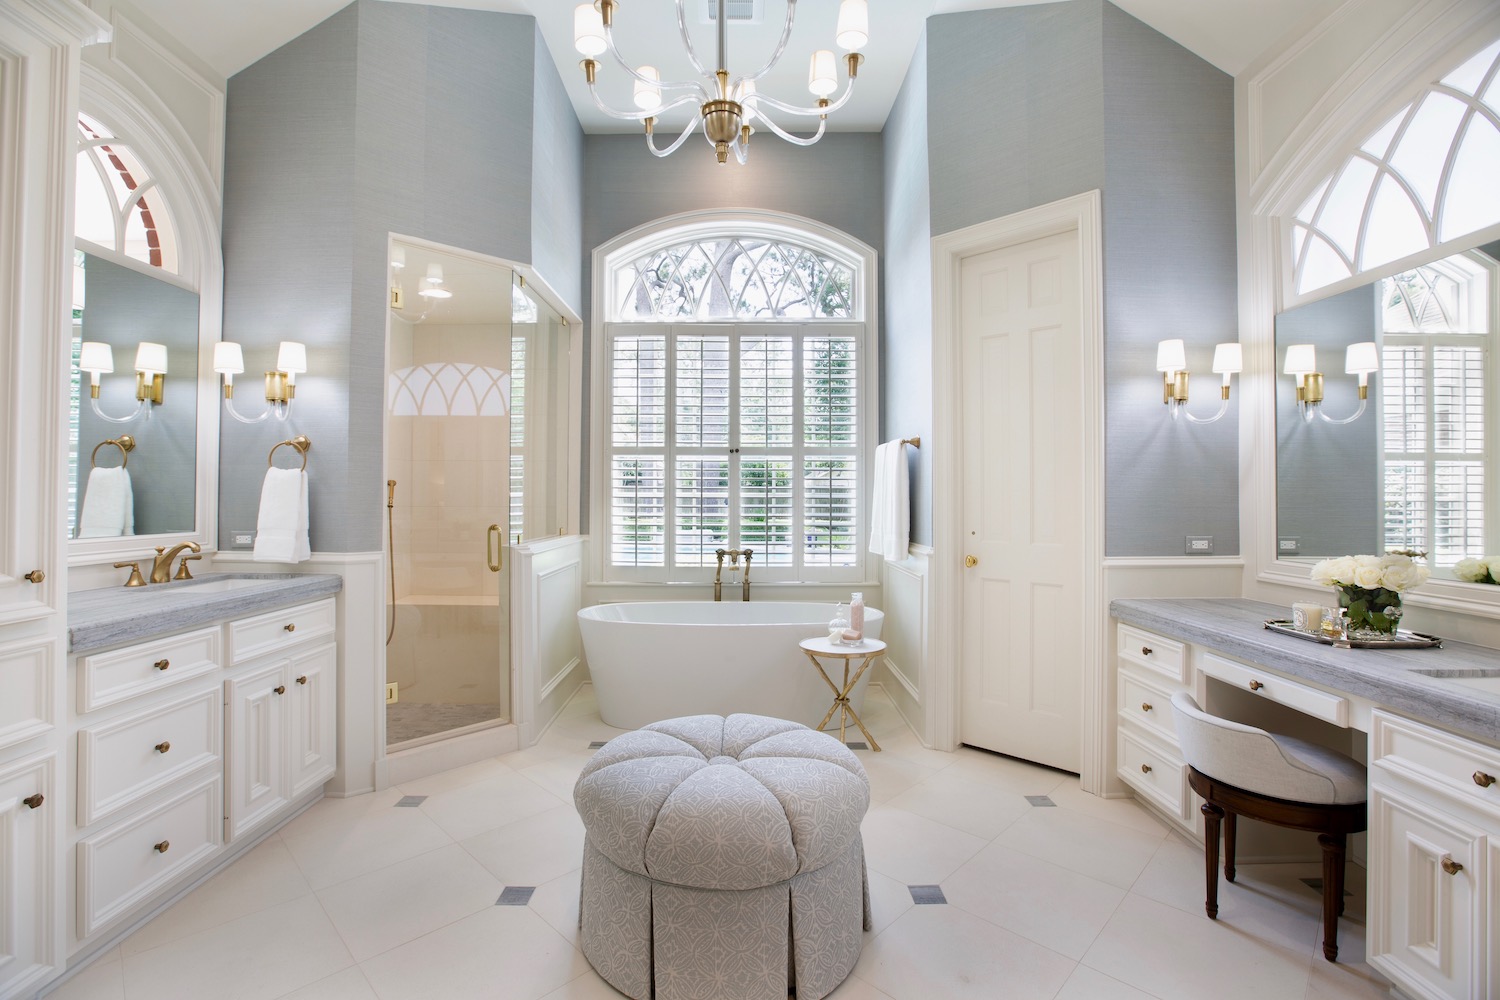
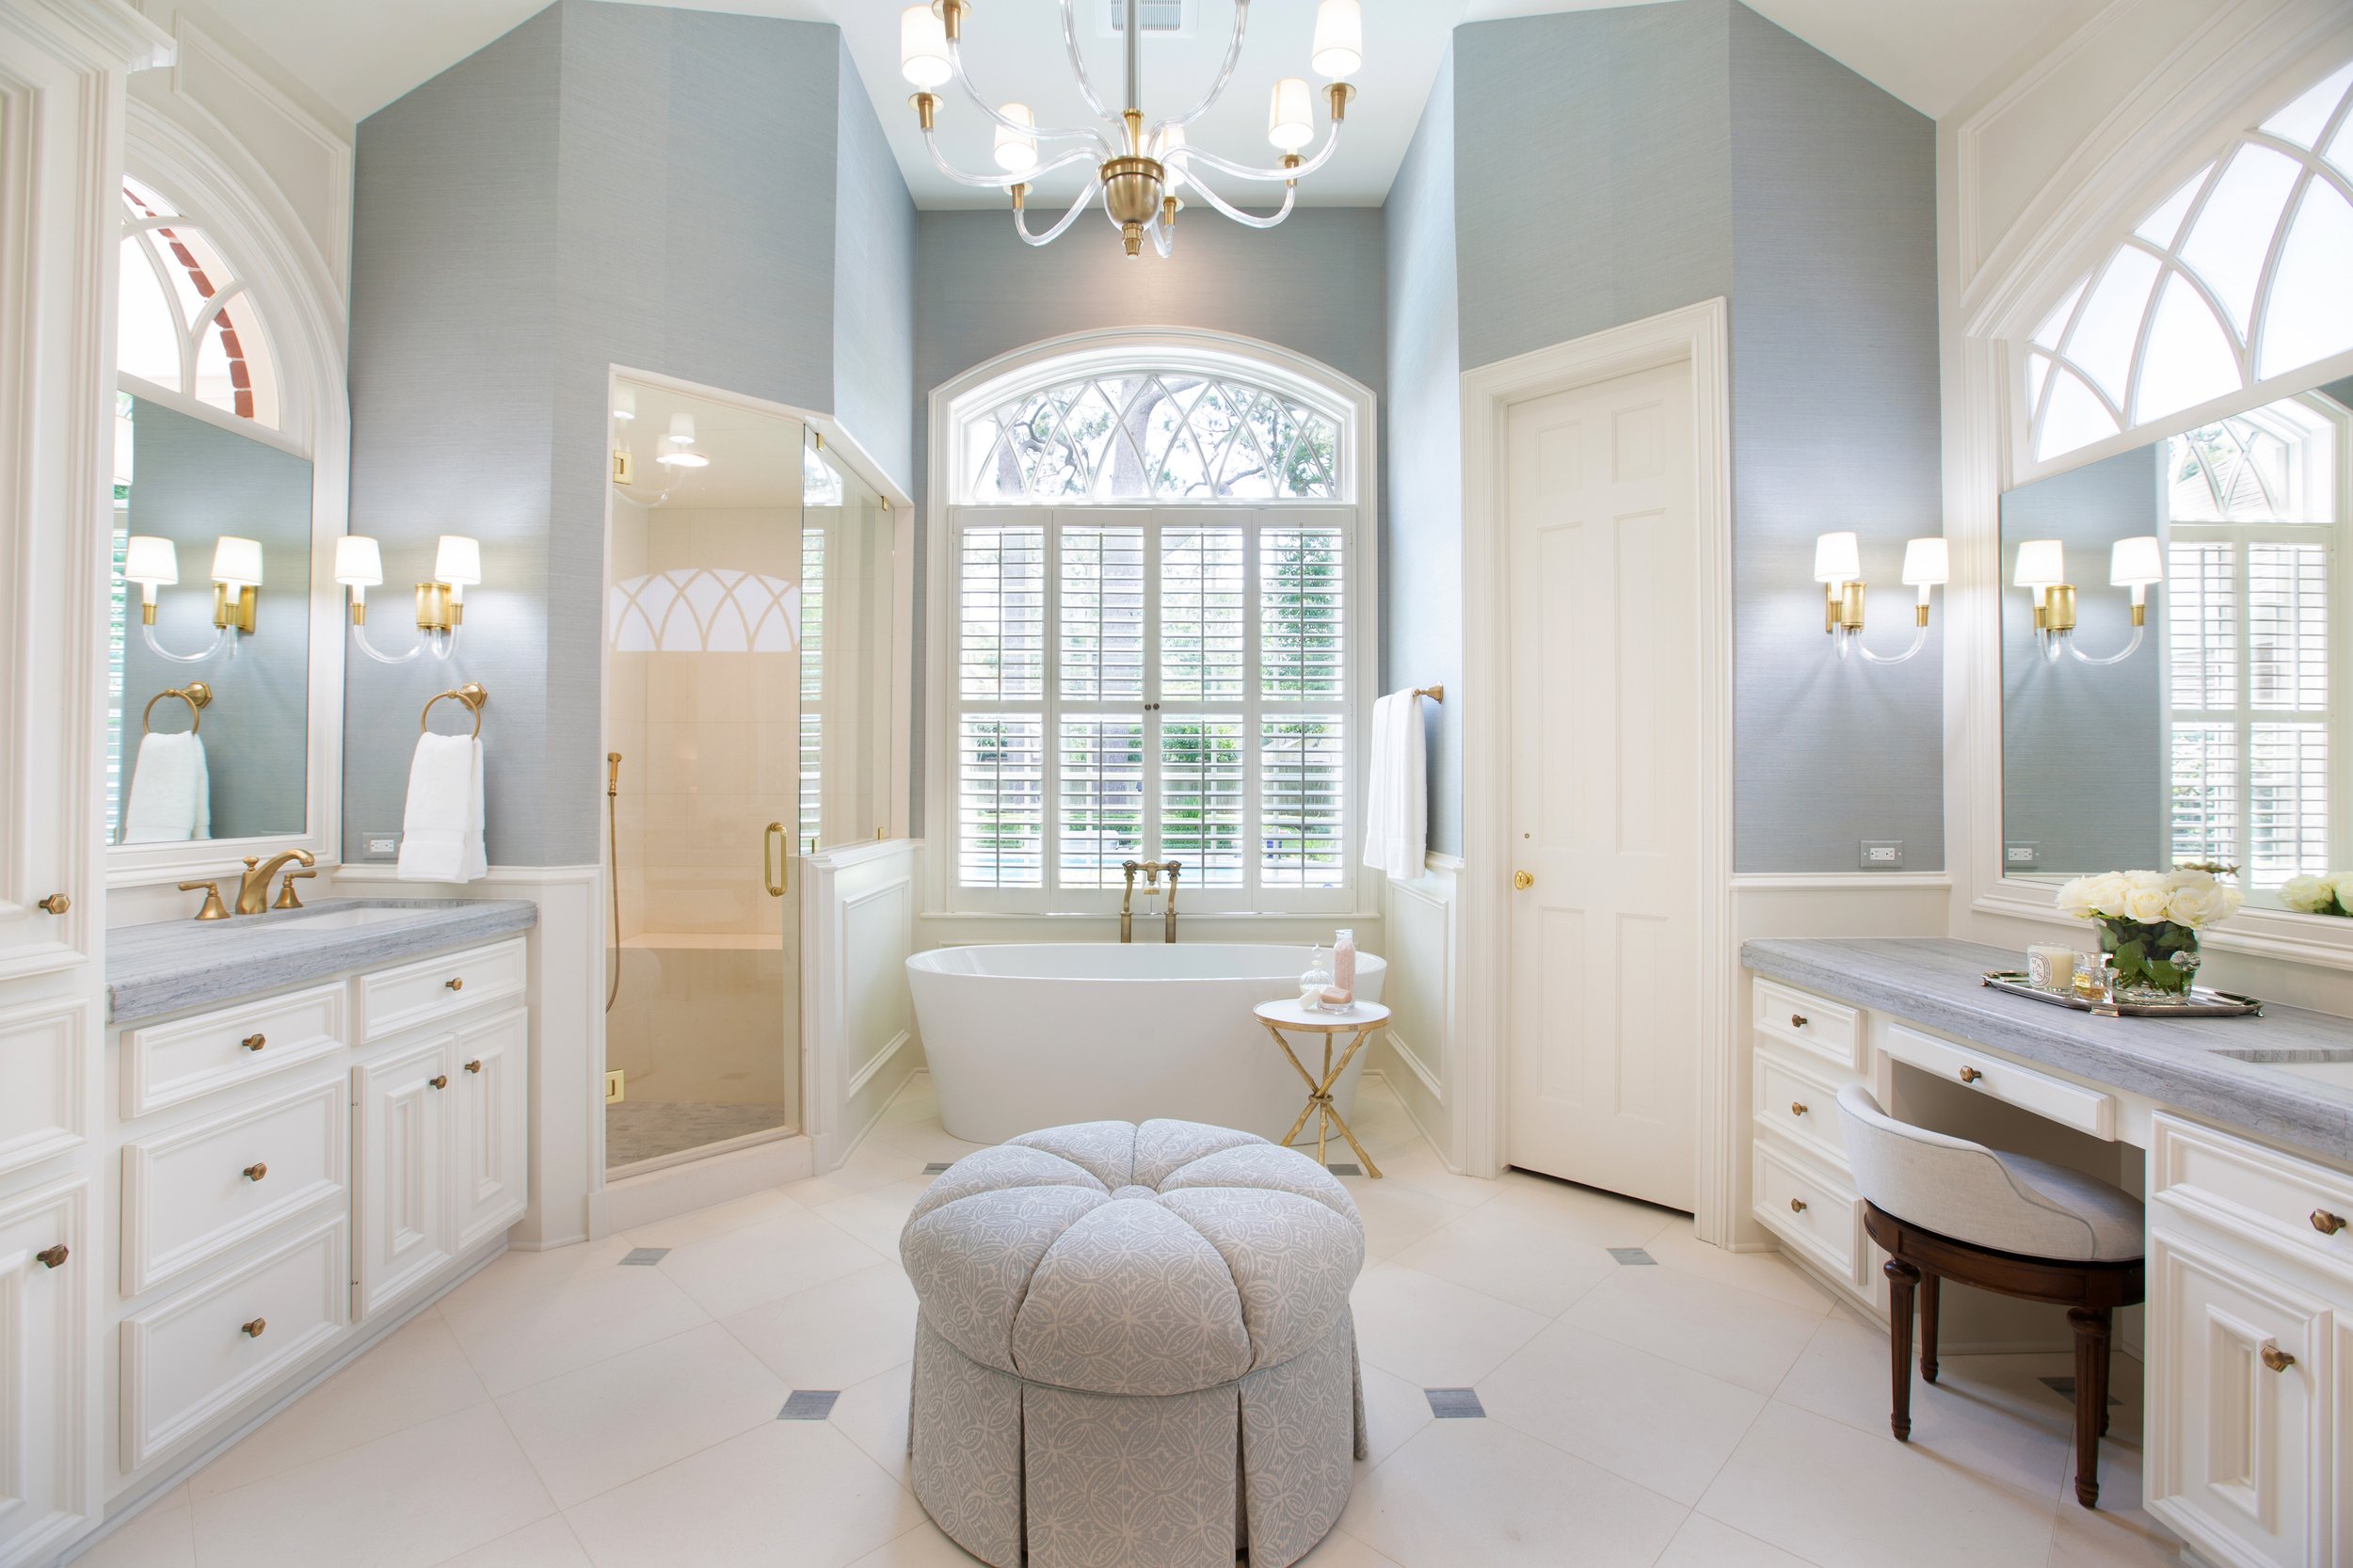
As with any space, lighting is key, which meant that we needed to address the windows and fixtures. The clerestory windows, while unique, proved to be problematic because they not only set the height of the mirrors but also affected the placement of any accent lighting. In the photo below, you can clearly see that the spacing of the window places it up against the shower wall on the right side, leaving us with only 4 inches from the glass to the wall to work with. Additionally, while the existing wall covering was busy, it had also hidden the awkward placement of the clerestory window above the “his” vanity, so even though we knew we needed to update the walls, we also knew it would be tough to find a way to adequately address the windows in the same way. Beyond this, our options for accent lighting styles & placement was limited due to the locations of the other features of the room - namely the way the ceiling was angled above the vanities and the faceted position of the walls (angles everywhere).


I looked at several different layouts to solve the lighting placement issue, but none of these really set the correct tone for the space because we were severely limited as to the type of fixture were able to use. A long linear fixture just didn’t have the graciousness of a shaded sconce. Placing a shaded sconce on either side of a mirror centered over the sink meant an off-center mirror that was narrow on “his” side. The dimension from the base of the window trim to the countertop made putting what I label a “three headed monster” below the window trim awkward.
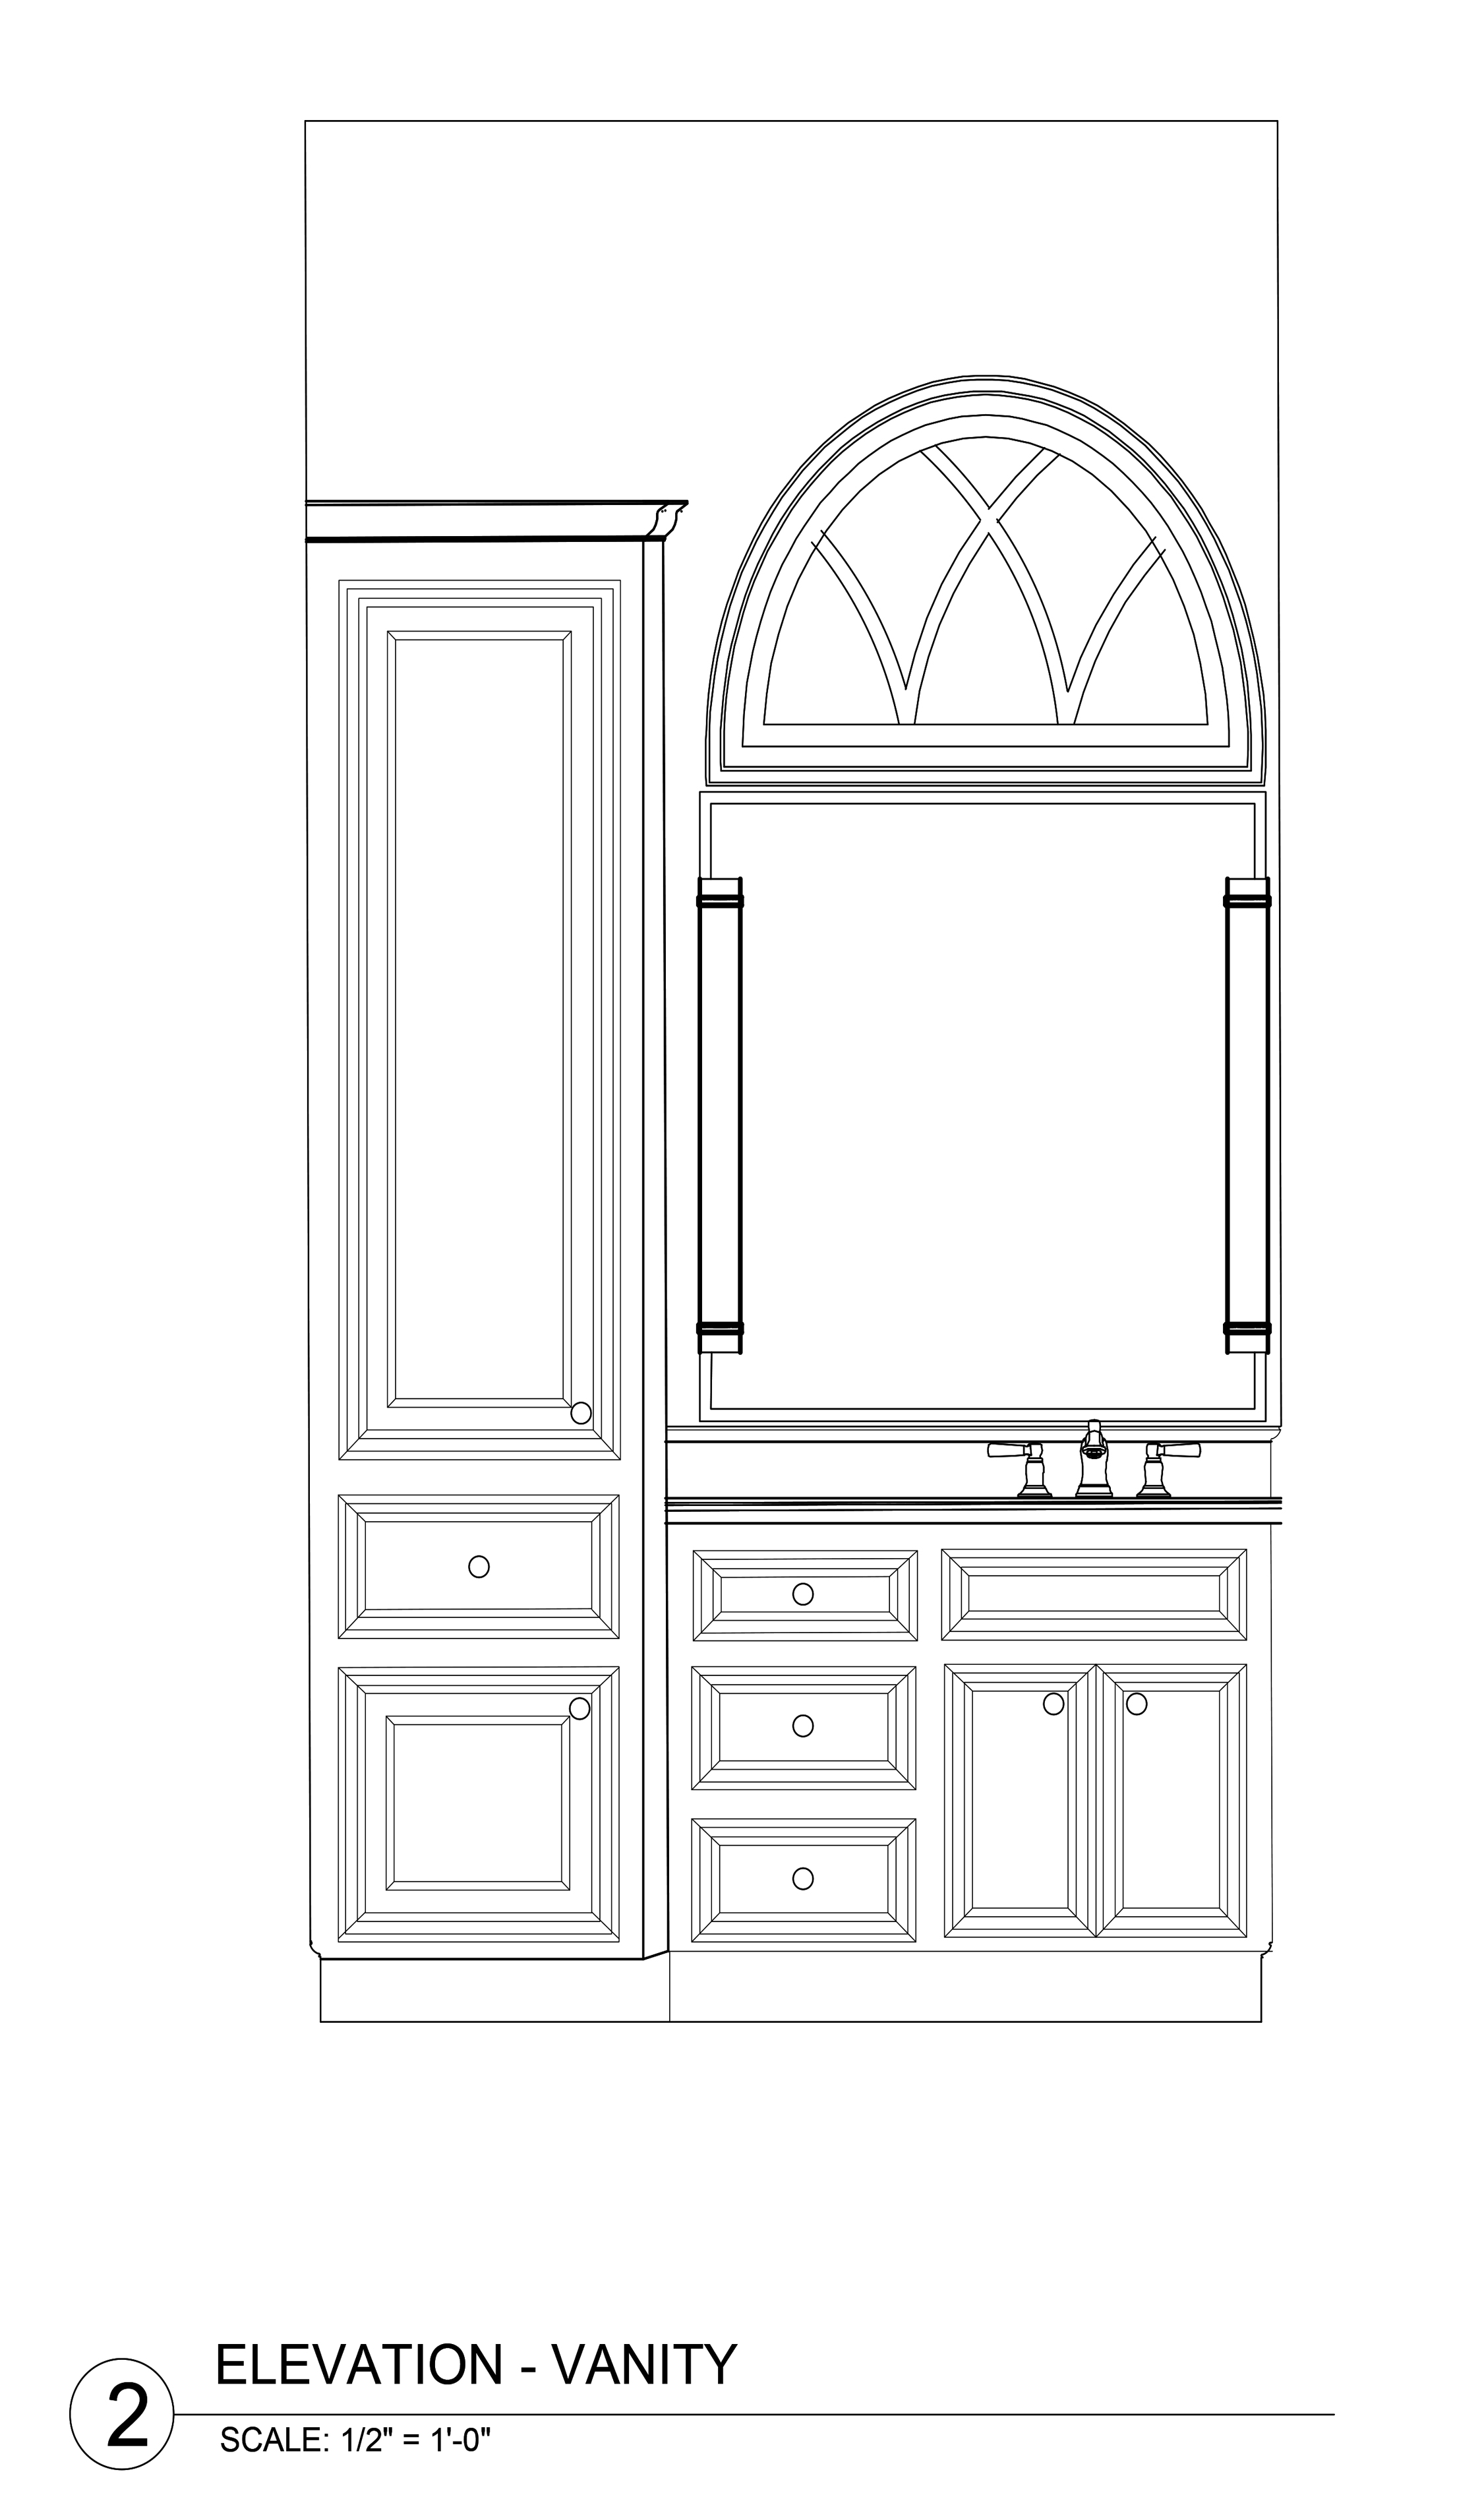
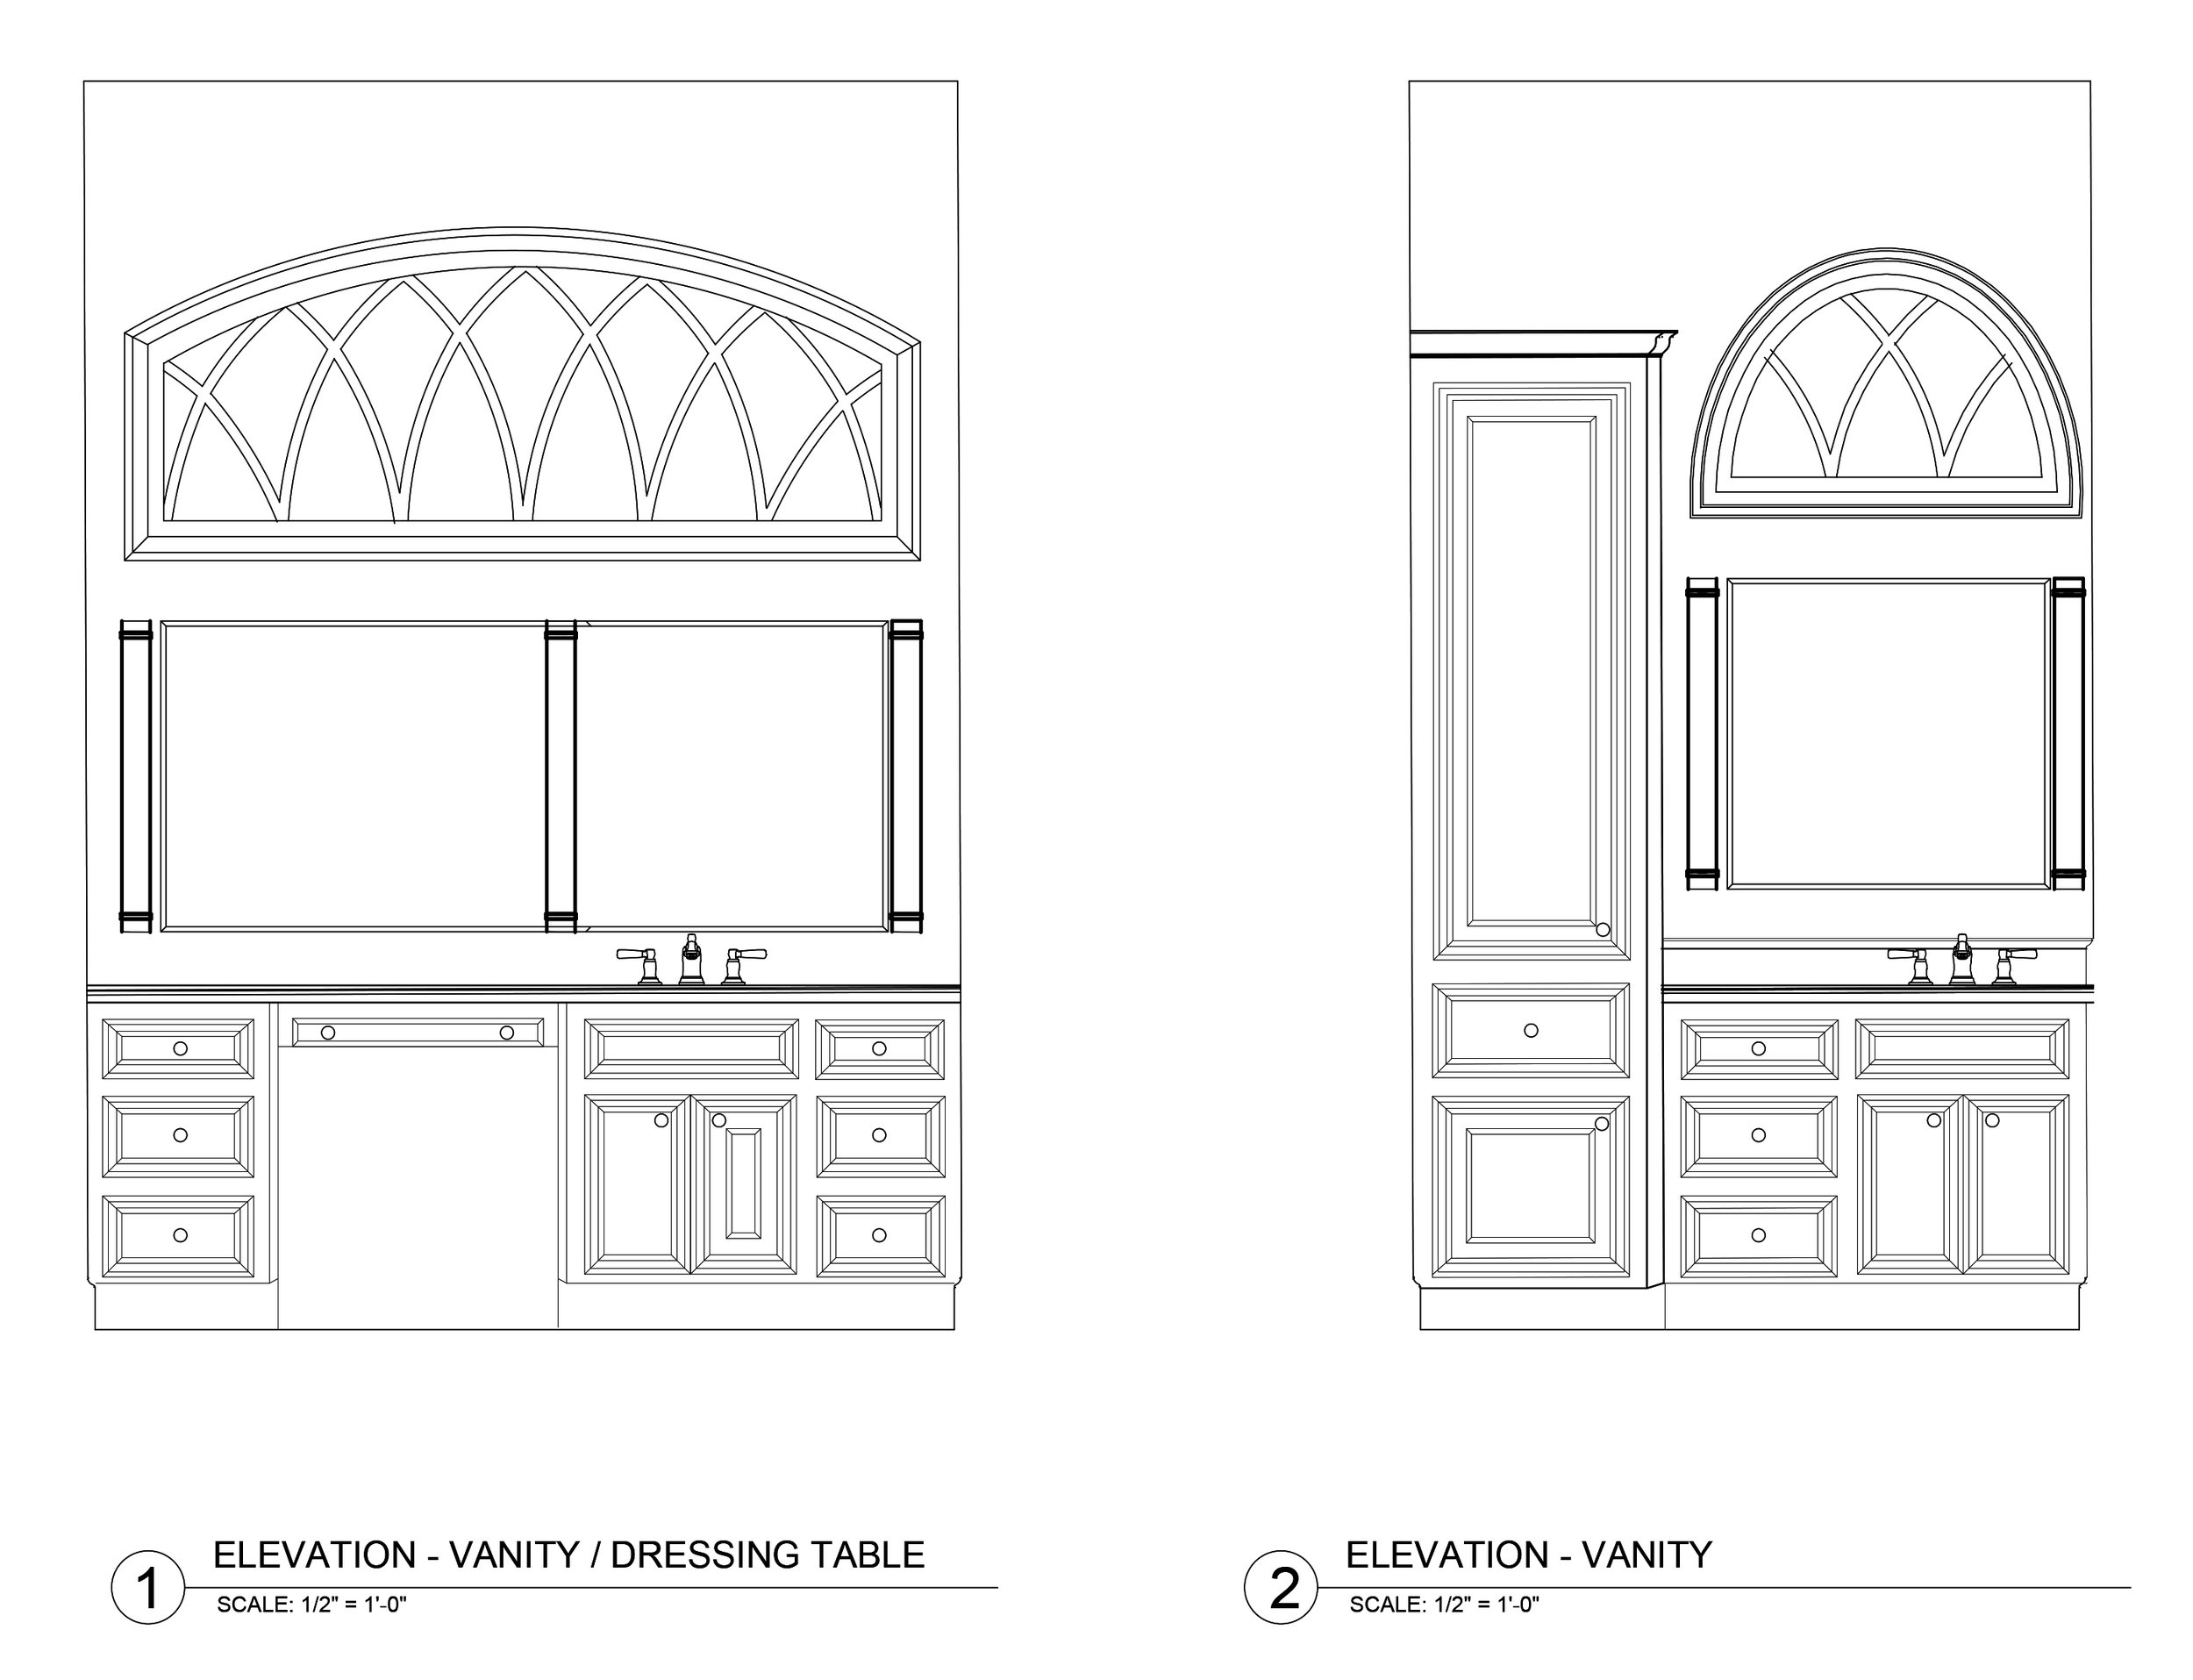
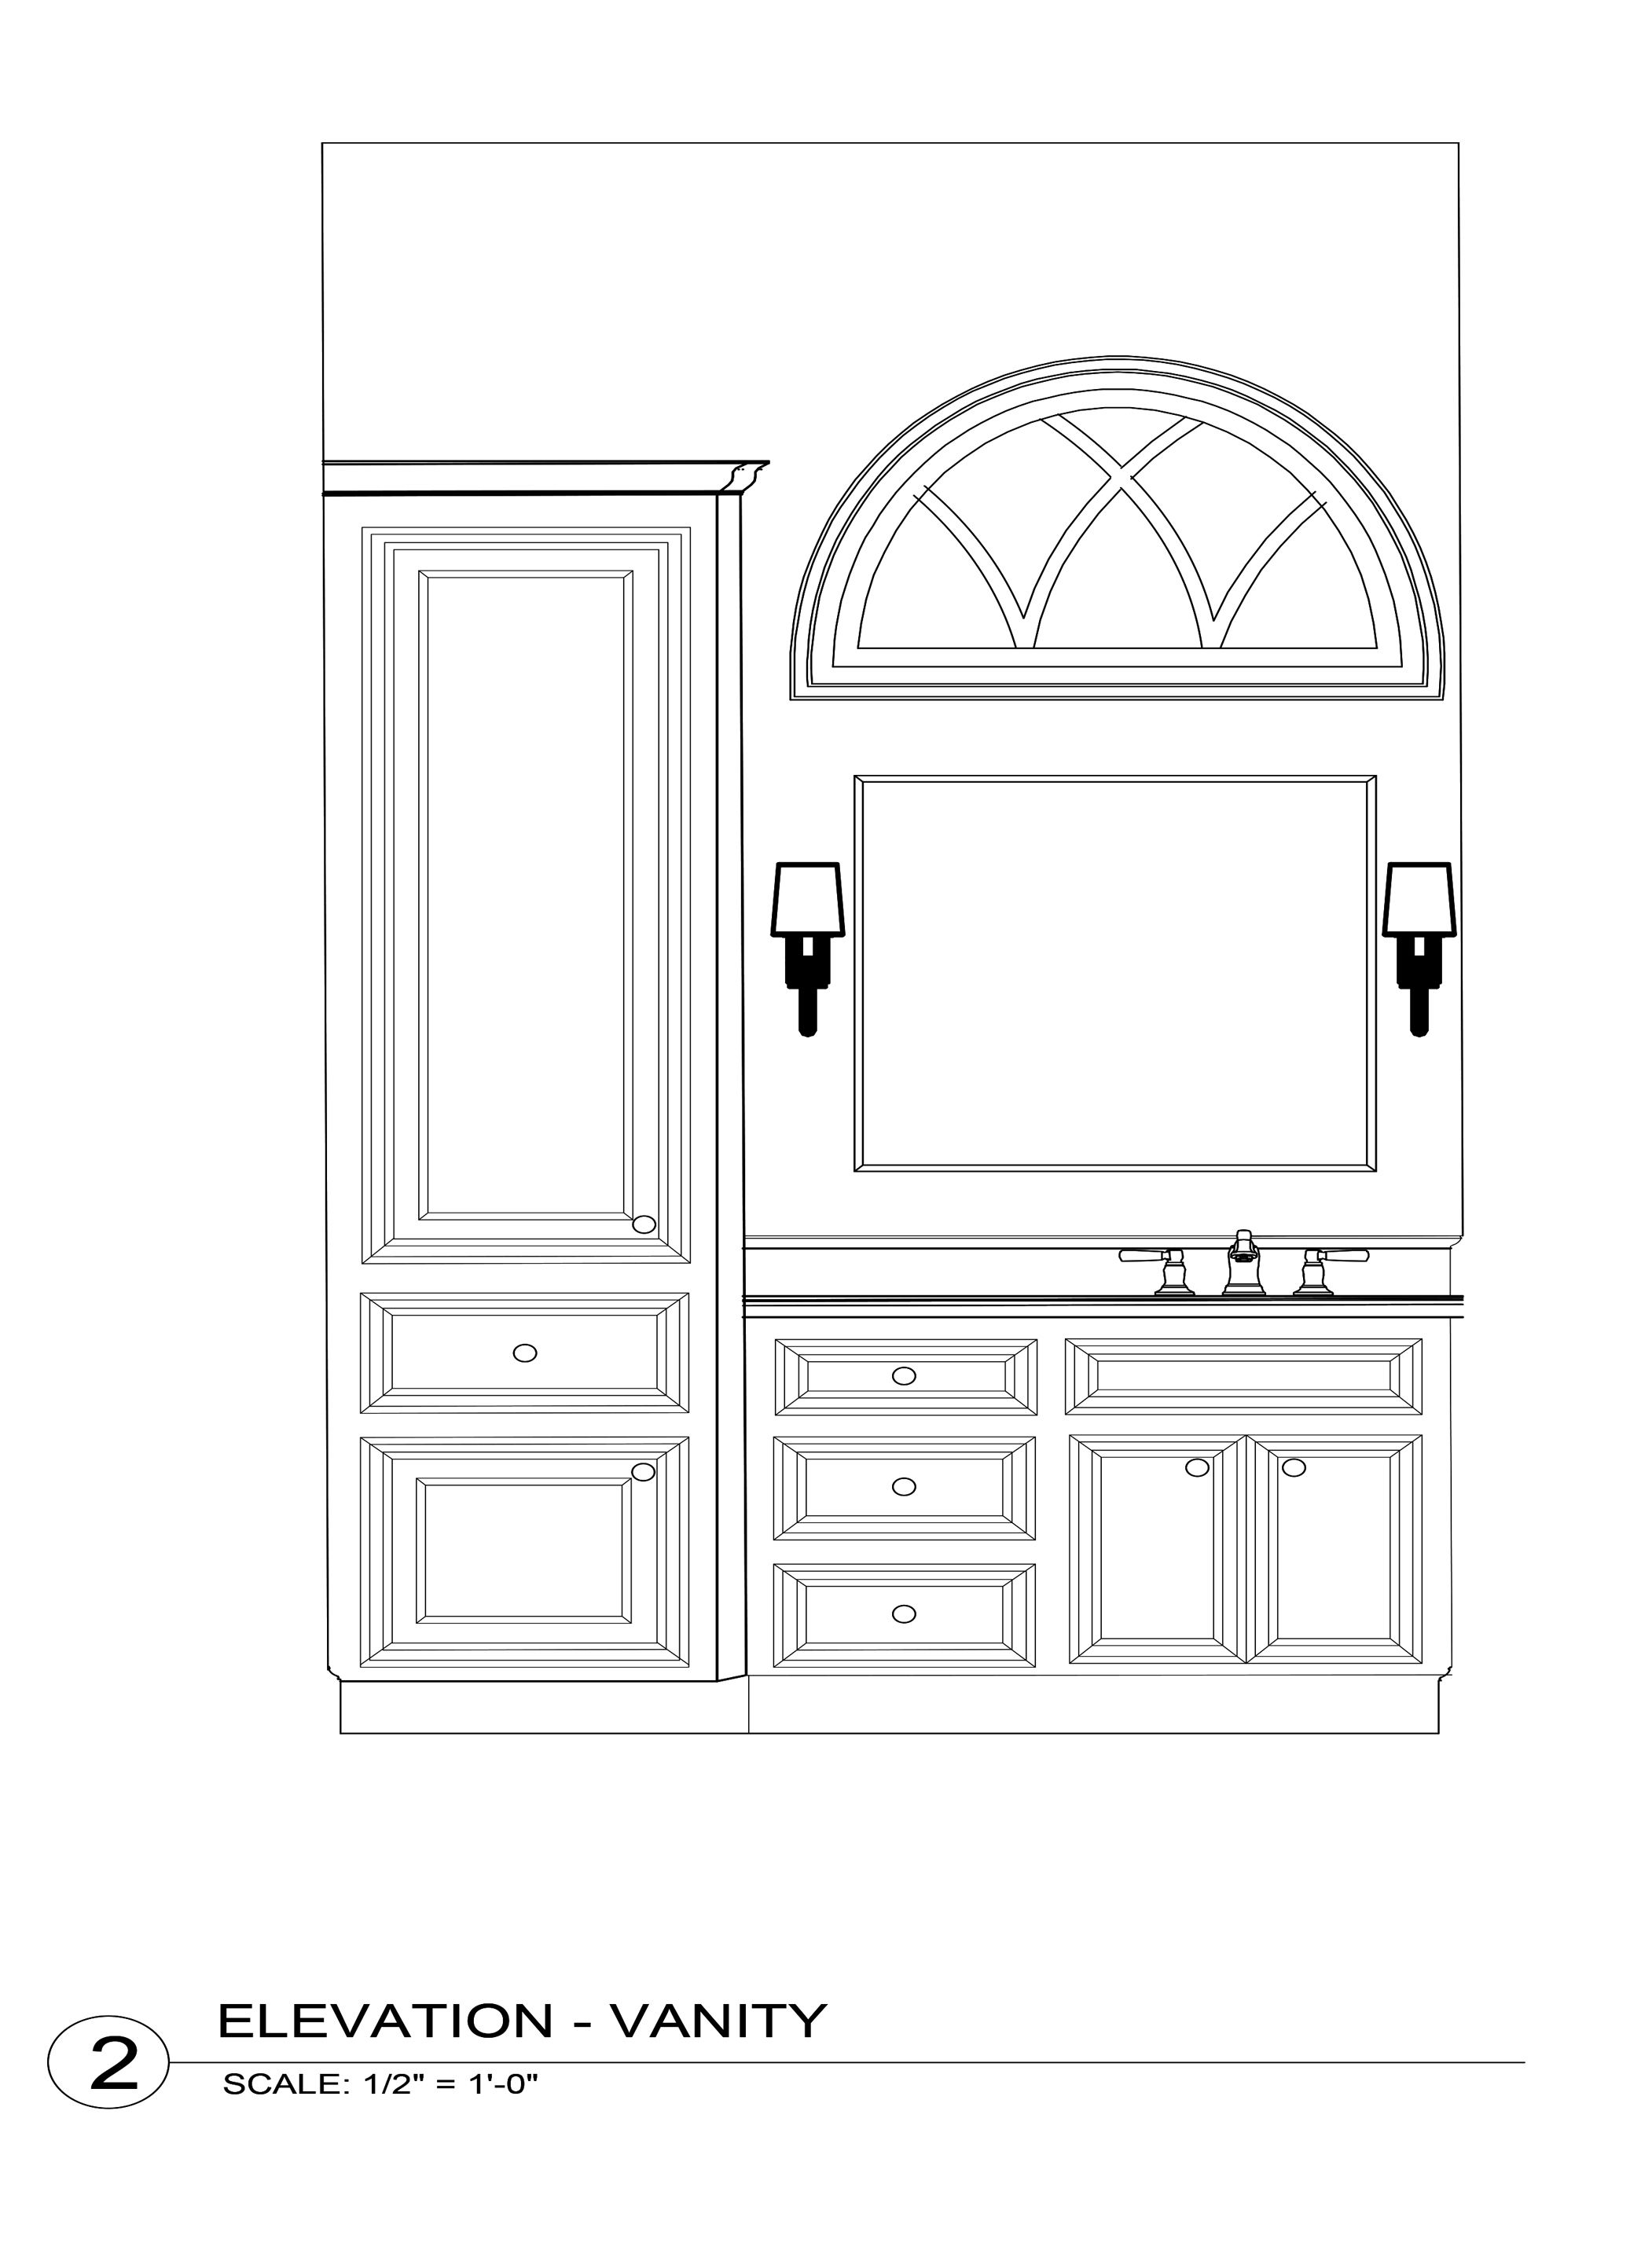


I considered moving the location of the sinks to solve the issue, but that idea hit a dead stop as well. Centering the sinks meant the loss of needed drawer space, and for the “her” vanity, the sink placement also greatly affected the seated section for makeup application. Needless to say, those were staying put.
The Solution
With a seemingly insurmountable list of challenges, this bathroom was a tough nut to crack. So, how did I solve it?
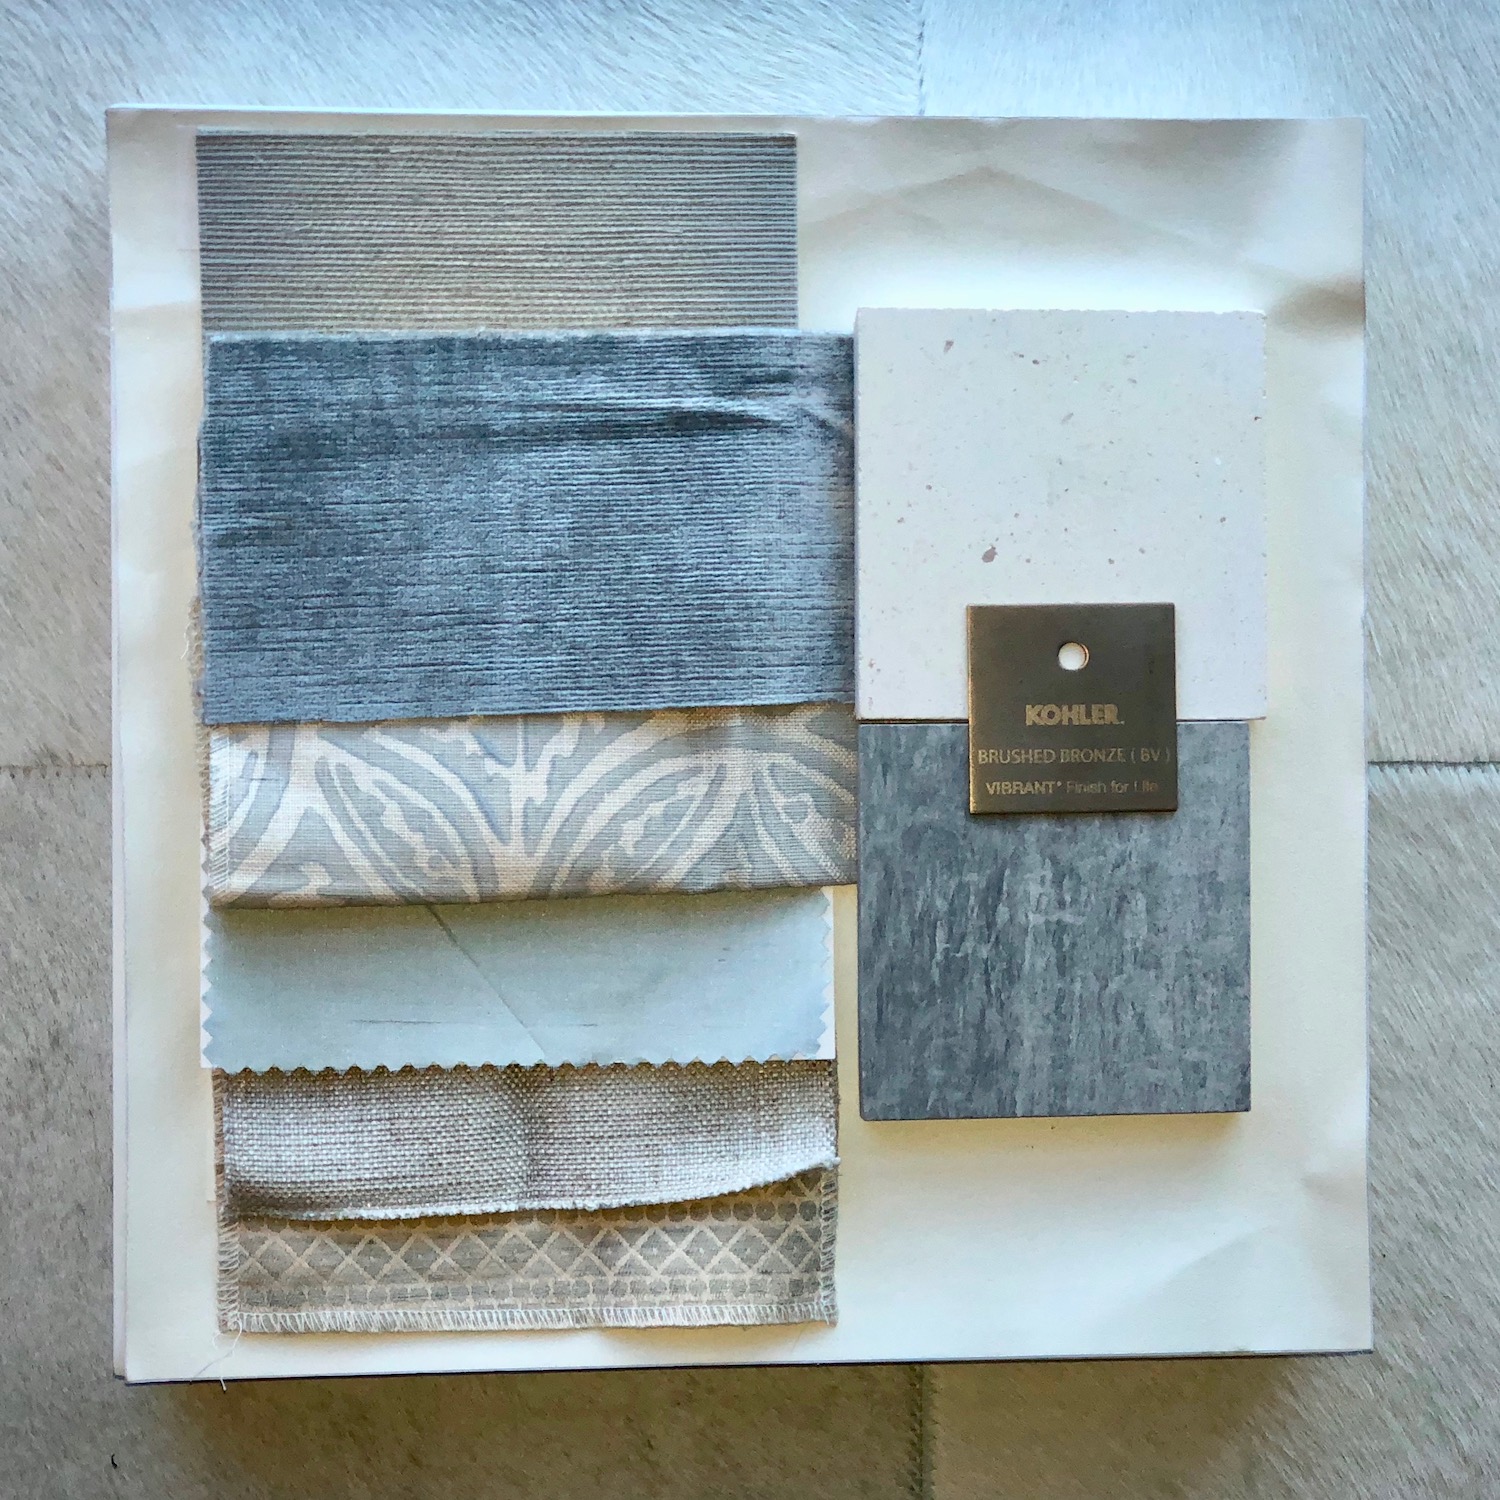
My concept centered on first providing grounding for the room in order to give everything a cohesive feeling without the cramped elements of the existing design. I presented Pam with two options. One option cladded the walls with full-height painted paneling around the entire bathroom, incorporating a hidden jib door into the paneling for the entrance to the water closet. The other was to wainscot the room in painted paneling with a solid-color woven wall covering above (this option included full-height paneling at the vanities). In both cases, incorporating paneling behind the vanities smoothed out the rough spots the window placement created, and as a bonus, the paneling reflected already-existing paneling in other key areas of the home. As you may remember me discussing in my previous post, it is my belief that context is key and creating a sense of continuity and authenticity to the design solution by placing the room within the overall aesthetic of the home is a must. So ensuring that both design options included this connection was essential.
Pam opted to go with the second wainscot option. She loved the idea of pairing the crisp paneling with the softness of the wall covering above. Plus, with the second design, there was an added benefit: by including the wainscot in the water closet, the access to the plumbing lines was concealed behind a touch latch panel on the WC side of the wall, making any future repairs a cinch.
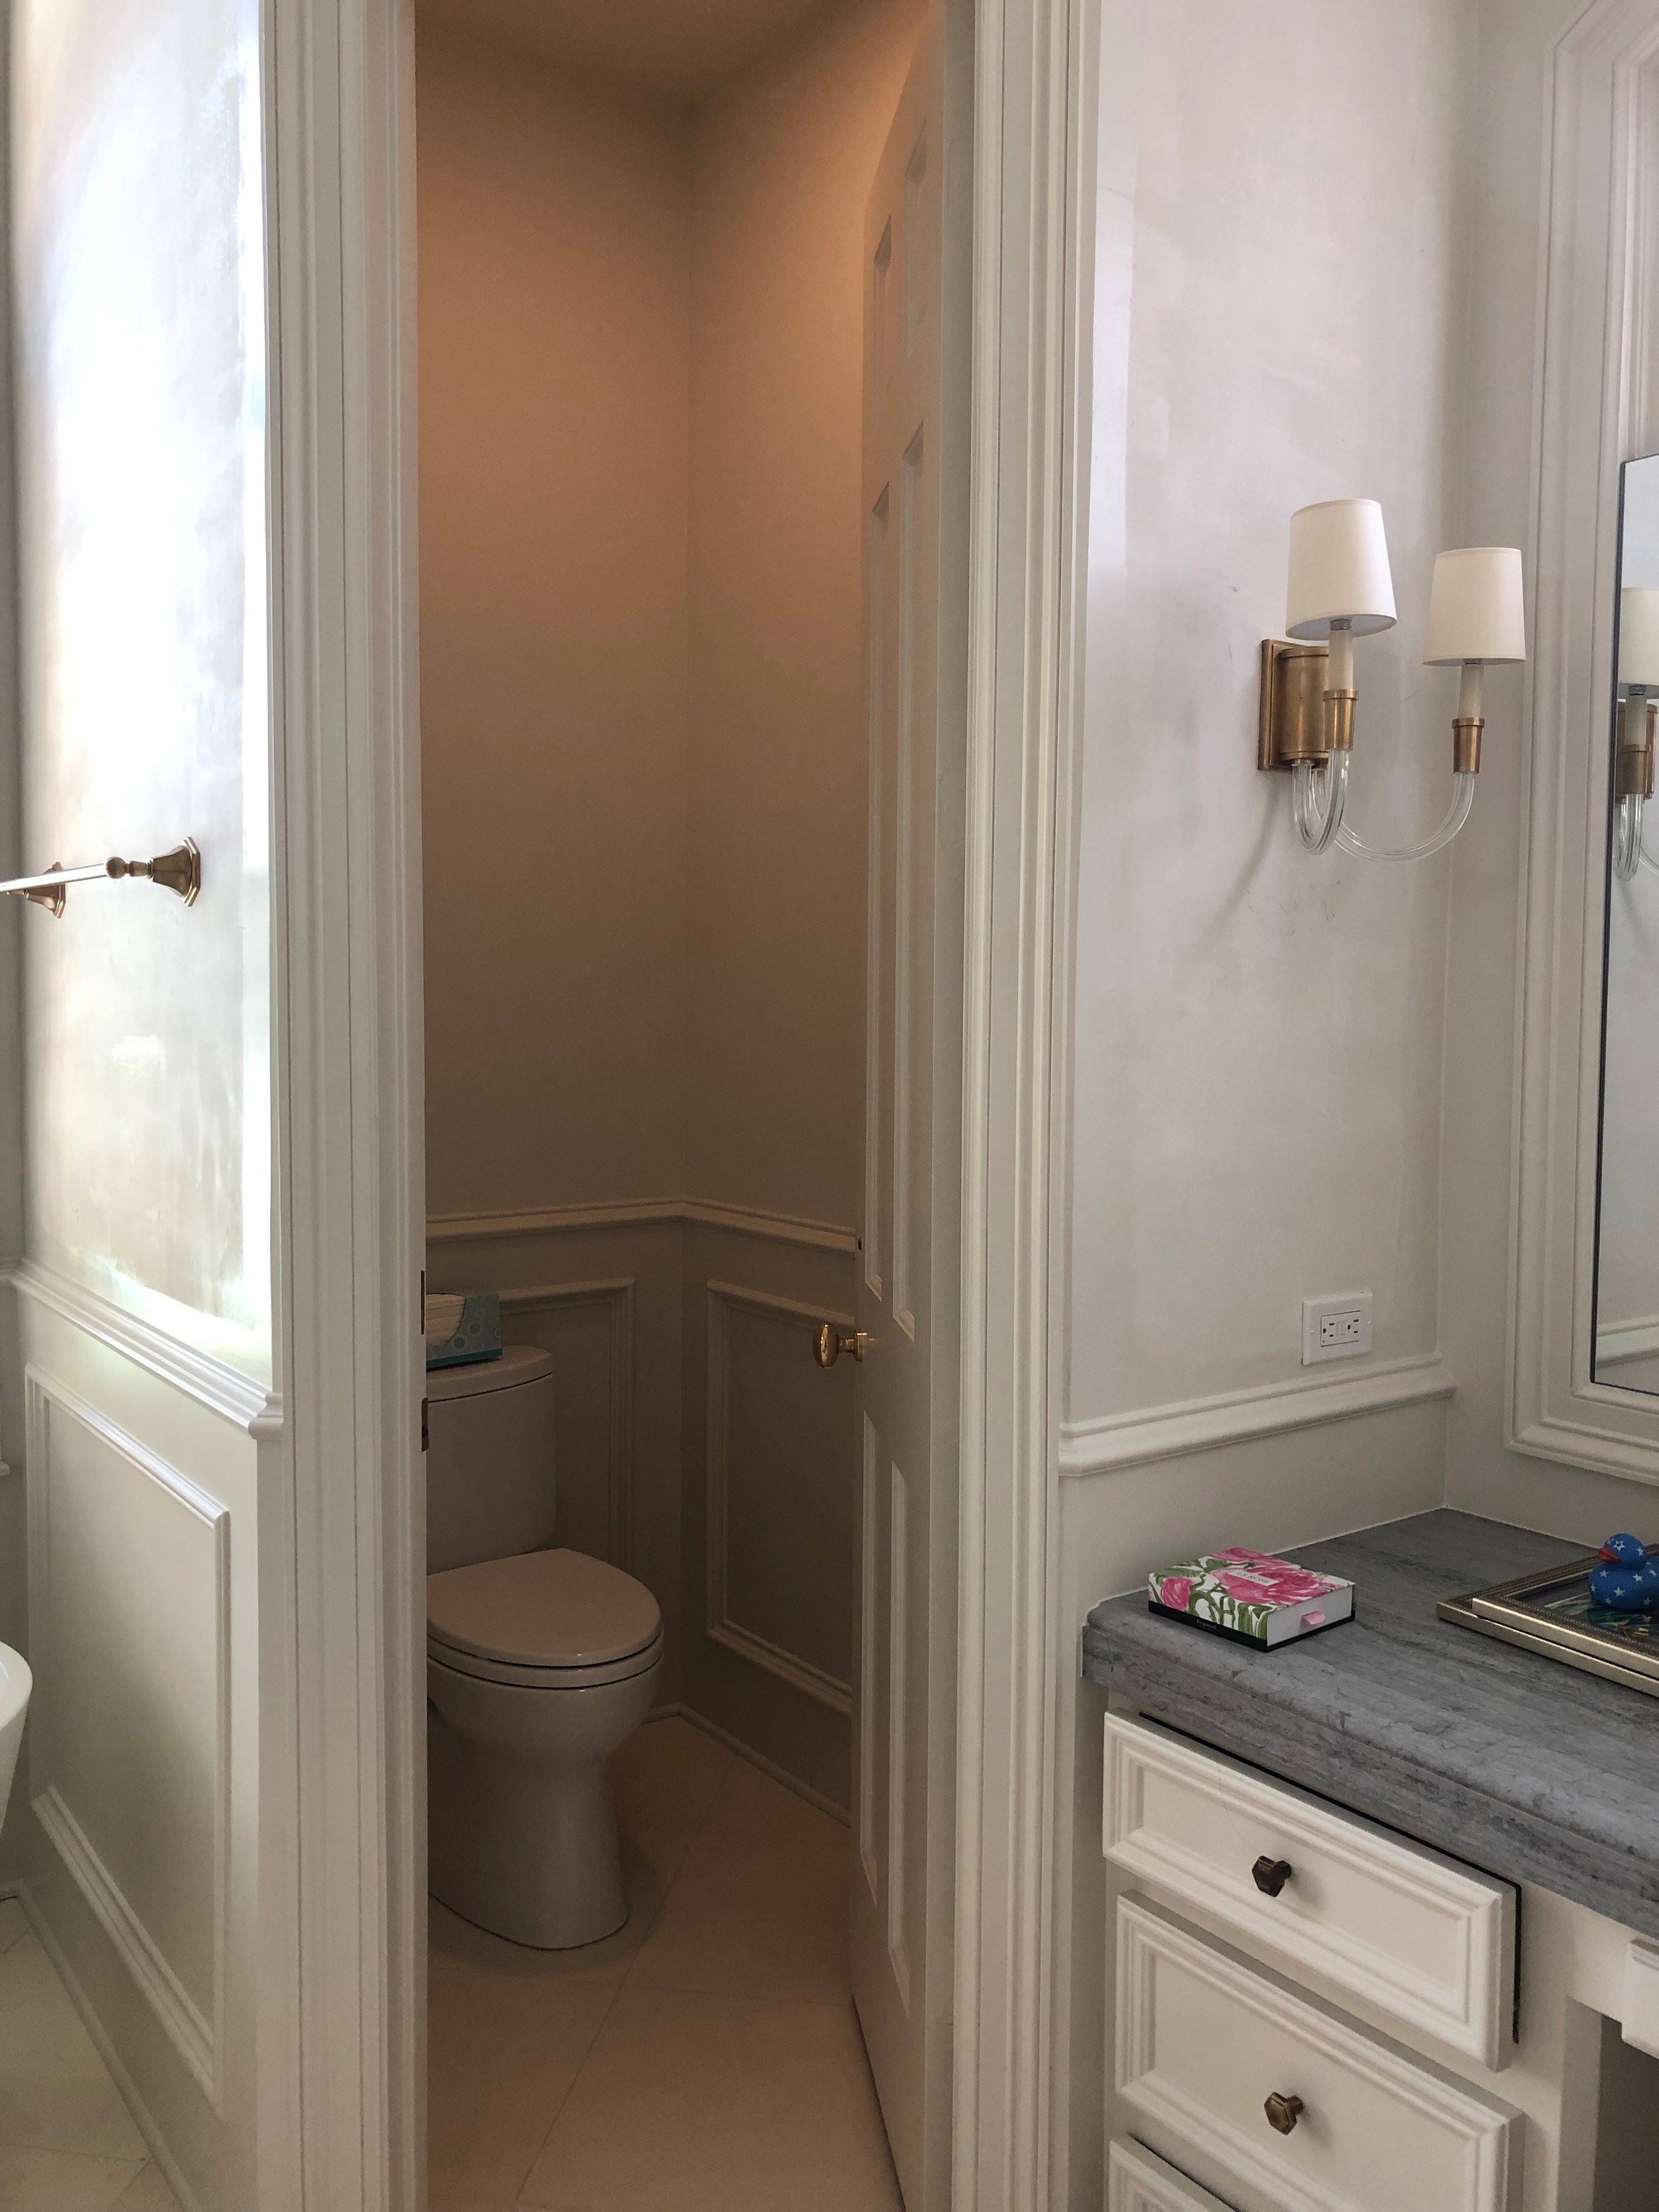

Once we had the grounding details in place, that tricky lighting business was next. Luckily, I managed to find a lighting solution that truly made the room come to life. First, I opted to hang the chandelier over the ottoman (as opposed to the currently-popular choice to hang it above the tub), which not only further anchored the room but also provided additional ambient light. Second, we decided to re-use the existing downlight locations, but give them an updated look by adding new fixtures with white baffles to reflect more light. (Quick tip: switching black baffles with white is a perfect way to update your room while still staying within your budget because they typically run between only $5-10 per fixture.) Aside from updates to the existing fixtures, we also made a few lighting additions, including pairs of double sconces at the vanities and a pair of downlights over each vanity. All of the fixtures were given dimmer switches to help create a variety of levels. The result was perfect lighting - no matter the mood or time of day.
To round out the design plans, we opted to replace the original shower glass with frameless butt-jointed glass, which provided a nice transition to the ceiling and walls. To accompany this change, we opted not to do a thicker stone frame facing the room to avoid a dated look that interfered with the room’s tailoring. Instead, we stuck to 2cm honed classic limestone - a timeless choice.
Finally, two unexpected challenges that arose were first that by paneling the room, it meant that the framed entrance to Pam’s closet was going to be too tight to accommodate the existing door trim. On this occasion, as on others, where keeping the existing trim meant creating an eyesore or crime against interior architecture, I specified that the trim profile be reduced to a smaller size in the same series. We were able to keep the existing trim style and accommodate the paneling, and the best part is that it is not obvious that we did it - it all blends in seamlessly with the rest of the space, creating the desired level of graciousness. The second challenge was that the original woven wall covering varied greatly in tone with in a single roll. It is important to note that it is not uncommon for this to happen however it is rarely this much. I am including an image below. Please note: due to the shade of the paper the problem is not as pronounced as in real life.

Because I have a fabulous installer, he caught the issue very quickly. He alerted me to the problem and halted installation. This is even more important than you think. Remedying the situation with our vendor meant clearly proving we had an issue. Vendors will often replace or restock uncut goods when there is a valid issue.
The Reveal
Pam now has an uplifting, welcoming, light filled bathroom to prepare for the day ahead or end it on a positive note, and if you ask me, that type of living is worth every challenge encountered along the way.